IMAP MS Outlook
Email IMAP Configuring Outlook SSL 2002/2003/XP IMAP
Domain Email Customers: If your secure email account with us uses a domain name other than mdofficemail.com, simply use your domain instead of mdofficemail.com wherever it appears in the instructions or the examples given. If you have purchased your own IP address & certificate, you may substitute any reference of mail.mdofficemail.com with your mail host name, e.g. mail.yourdomain.com.
- Step 1: Create your Account (Part 1)
- Step 2: Create your Account (Part 2)
- Step 3: Server Type
- Step 4: Account Settings
- Step 5: Outgoing Server Configuration
- Step 6: Advanced Configuration
- Step 7: Finish the Wizard
- Manufacturer Technical Support
- For Further Assistance
This document will help you to configure your Outlook 2002, Outlook 2003, or Outlook XP Email client to work with the MDofficeMail Secure Email Server.
To use Outlook for accessing and using your Secure Email account you should take the following steps:
- Browse to http://officeupdate.microsoft.com/
- Click on "Check for updates" before you configure your client to
make sure you have the latest updates for your version of Outlook.
- Problems have been noted with some older releases of Outlook with SSL that have been corrected with the latest service pack downloads from Microsoft.
Step 1: Create your Account (Part 1)
- Open Outlook 2002/2003/XP.
- Select the "Tools" pulldown menu and select "Email Accounts."
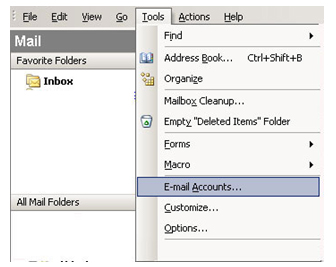
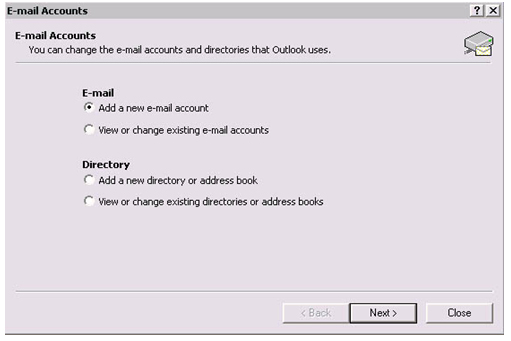
Step 2: Create your Account (Part 2)
- Select "Add a new email account."
- Click "Next."
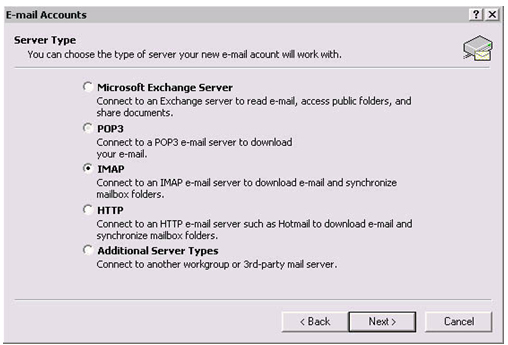
Step 3: Server Type
- Select "IMAP" for the Server Type.
- Click "Next."
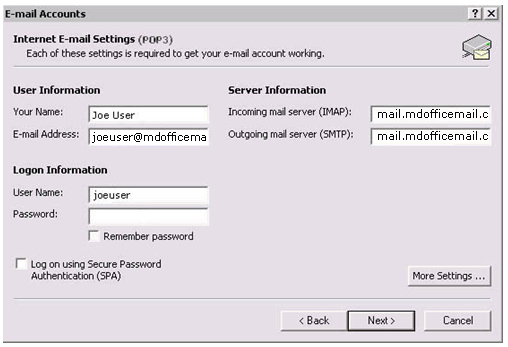
Step 4: Account Settings
- Enter in the following information:
- Your Name: Your Name as you want it to be displayed in outgoing emails.
- Email Address: Your Email Address
- Incoming mail Server (IMAP): type mail.mdofficemail.com
- Outgoing mail Server (SMTP): type mail.mdofficemail.com
- User Name: Your user name
- Password: Your Secure Email Password
- Leave the "Log on using Secure Password Authentication (SPA)" unchecked.
- Click on More Settings.
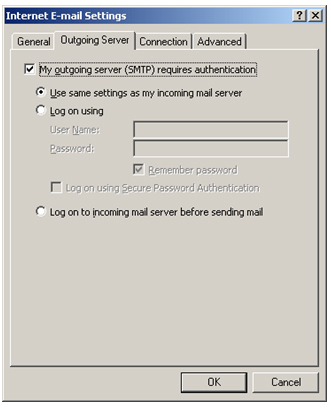
Step 5: Outgoing Server Configuration
- Click the "Outgoing Server" tab.
- Make sure that "My outgoing server (SMTP) requires authentication" is checked.
- Click the "Advanced" tab
Step 6: Advanced Configuration
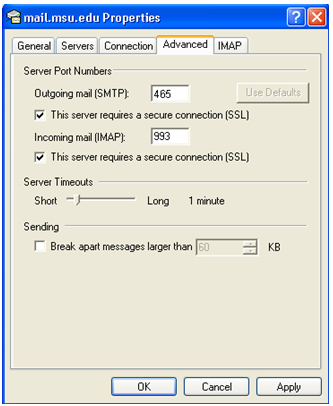
- Check BOTH of the "This server requires a secure connection (SSL)" checkboxes for the incoming and outgoing servers.
- Make sure that you change the "Outgoing server (SMTP)" number to 465, and verify the "Incoming server (POP3)" number is 995.
- Click "OK."
- Click "Next".
Step 7: Finish the Wizard
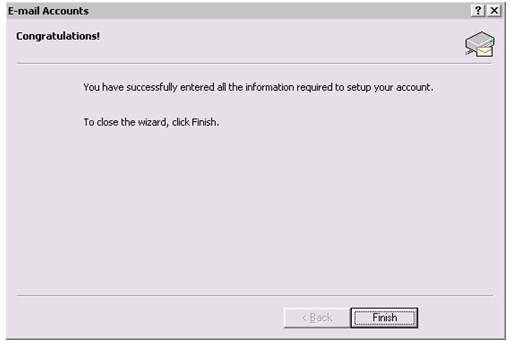
- Click the "Finish" button.
- You should now be able to send and receive Email.
Manufacturer Technical Support
For technical support from Microsoft, please visit http://support.microsoft.com/default.aspx?scid=sz;[ln];top.