Email Netscape POP
Secure Email Configuration - Netscape SSL Secure POP Email
Secure Domain Email Customers: If your secure email account with us uses a domain name other than mdofficemail.com, simply use your domain instead of mdofficemail.com wherever it appears in the instructions or the examples given. If you have purchased your own IP address & certificate, you may substitute any reference of mail.mdofficemail.com with your mail host name, e.g. mail.yourdomain.com.
This item provides information on these topics:
- Step 1: Create your Email Account (Part 1)
- Step 2: Create your Email Account (Part 2)
- Step 3: New Account Setup
- Step 4: Identity
- Step 5: Server Information
- Step 6: User Name
- Step 7: Account Name
- Step 8: Congratulations
- Step 9: Account Configuration
- Step 10: Server Settings
- Step 11: Outgoing Server (SMTP) Settings
- Step 12: Advanced Outgoing Server (SMTP) Settings
- Manufacturer Technical Support
This document will help you to configure a secure email account using your compatible Netscape Secure Email client to work with MDofficeMail Secure Email Server system.
Compatible Netscape versions: 6.2, 7.0
For Netscape IMAP secure mail server client configuration documentation, please click here.
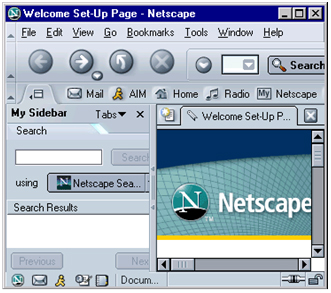
Step 1: Create your Secure Email Account (Part 1)
- Click on "Mail" button on the menu.
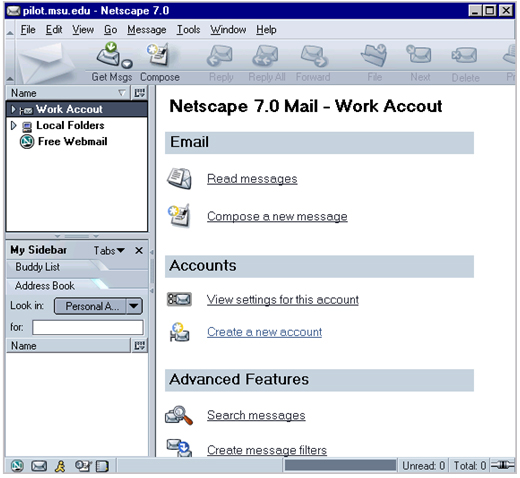
Step 2: Create your Secure Email Account (Part 2)
- If it is the first time you are configuring a wizard pops up to step you through.
- If you do not receive the wizard:
- Click on the "Edit" pulldown menu
- Select "Mail & Newsgroup Account Settings"
- Click on "Add Account"
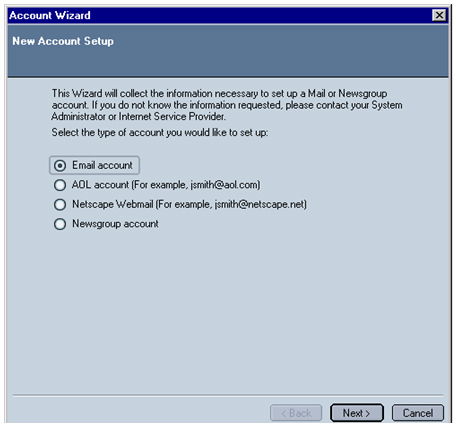
Step 3: New Secure Email Account Setup
- The wizard window opens. Select "Email account" if not selected.
- Click "Next."
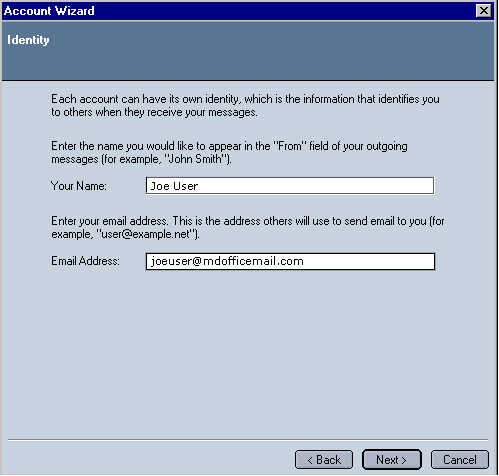
Step 4: Identity
- Enter your name as you want to appear in your outgoing mail.
- Enter your Email address (ie: joeuser@mdofficemail.com).
- Click "Next."
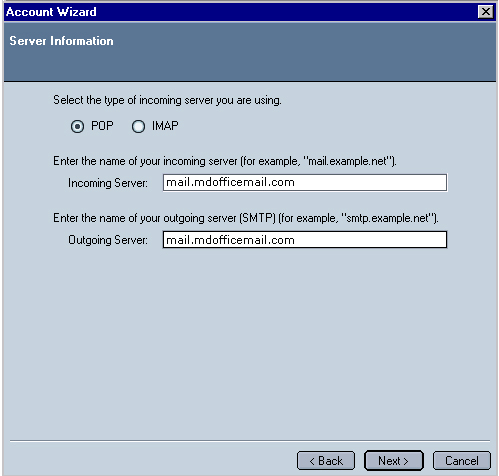
Step 5: Server Information
- Select "POP" if not selected.
- Type mail.mdofficemail.com in BOTH fields of "Incoming Server" and "Outgoing Server."
- Click "Next."
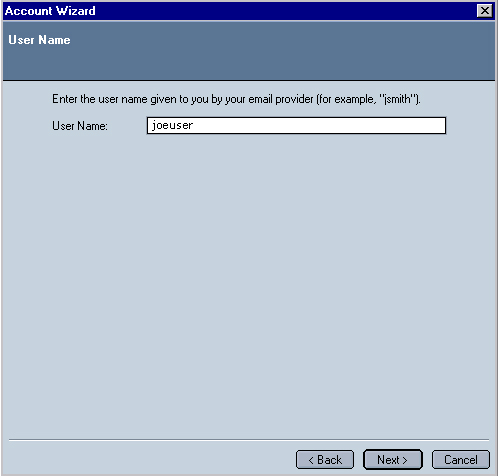
Step 6: User Name
- Enter your user ID (ie: joeuser)
- Click "Next."
Step 7: Account Name
- Enter a name for this account (ie: Work Account).
- Click "Next."

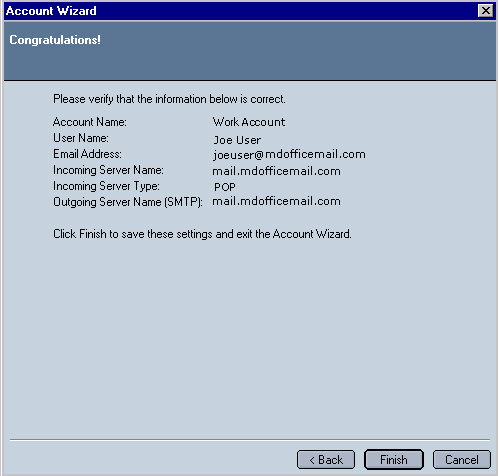
Step 8: Congratulations on your secure email setup
- Check the information on this window.
- If it is correct, click the "Finish" button; otherwise use the back button to correct the information.
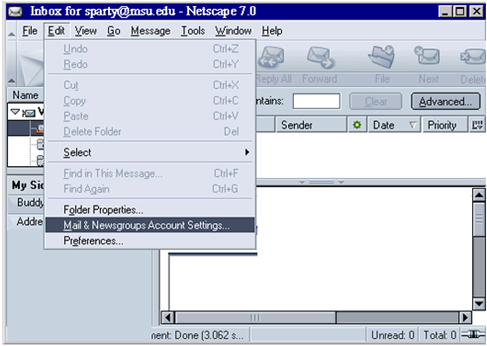
Step 9: Account Configuration
To configure your account to work with the MDofficeMail Secure Email system, you need to go through the following steps.
- In "Netscape Mail" choose the "Edit" pulldown menu.
- Select "Mail & Newsgroups Account Settings."
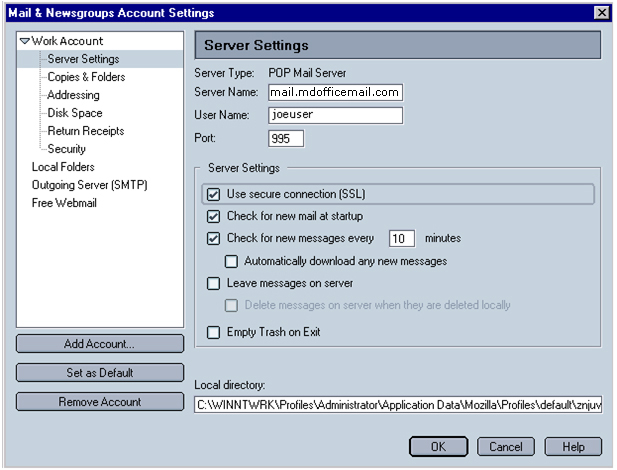
Step 10: Secure Email Server Settings
- Make sure the "Use secure connection (SSL)" is checked.
- Although it is not required, we recommend the following for POP mail
configuration:
- Check the "Leave mail on server" checkbox (not checking this will tell Netscape to delete the Emails from the server and only allow you to check your Email from the computer that you are setting up Netscape).
- Check the "Delete messages on server when they are deleted locally" checkbox (necessary if you choose to have the "Leave mail on server" checked, as your inbox will fill up on the server over time)
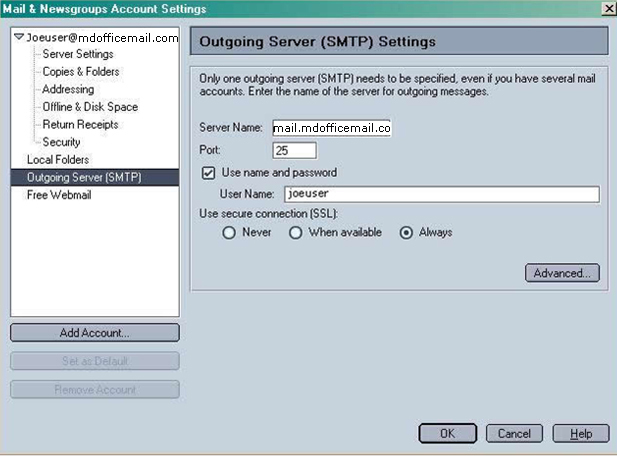
Step 11: Outgoing Server (SMTP) Settings
- In the left band select "Outgoing Server (SMTP)."
- Make certain that "Server name" is mail.mdofficemail.com and "Port" is 25.
- Click on the "Advanced" button.
Step 12: Advanced Outgoing Server (SMTP) Settings
- Make sure "mail.mdofficemail.com:25" is selected as Default.
- Click "OK."
- Exit Netscape and restart it for the changes to take effect. You should now be able to send/receive Email.

Manufacturer Technical Support
For technical support from Netscape, please visit http://help.netscape.com/netscape7/.