Mac Entourage POP
Secure Email Configuration Entourage SSL v.X POP for MacOS X
Secure Domain Email Customers: If your secure email account with us uses a domain name other than mdofficemail.com, simply use your domain instead of mdofficemail.com wherever it appears in the instructions or the examples given. If you have purchased your own IP address & certificate, you may substitute any reference of mail.mdofficemail.com with your mail host name, e.g. mail.yourdomain.com.
This item provides information on these topics:
- Step 1: Go to Accounts
- Step 2: Edit the Account
- Step 3: Account Settings Configuration
- Step 4: Advanced POP Options
- Step 5: Advanced SMTP Options
- Manufacture Technical Support
- For Further Assistance
This document will help you to configure secure email account for your Entourage Email client to work with MDofficeMail Secure Email Server.
Compatible Entourage version: v.X (part of the Office v.X
suite)
Compatible MacOS versions: OS 10.2.x (Jaguar), 10.3.x
(Panther)
NOTE: Update to Office v.X version 10.1.2 or higher. This update can be found at http://www.mactopia.com/. These instructions do NOT work for Entourage 2004 which is currently unsupported and in testing.
NOTE: Secure passwords are NOT supported with Entourage using SSL SMTP authentication.
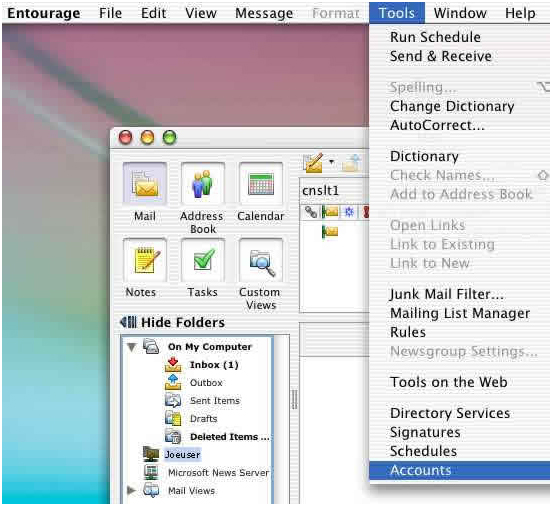
Step 1: Go to Accounts
- Click on the "Tools" pulldown menu
- Select "Accounts"
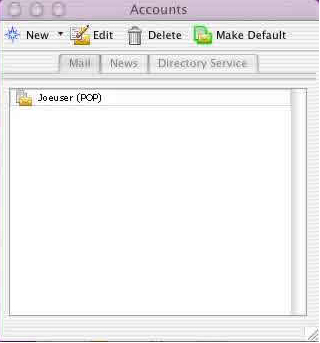
Step 2: Edit the Account
- Highlight the account name and select "Edit"
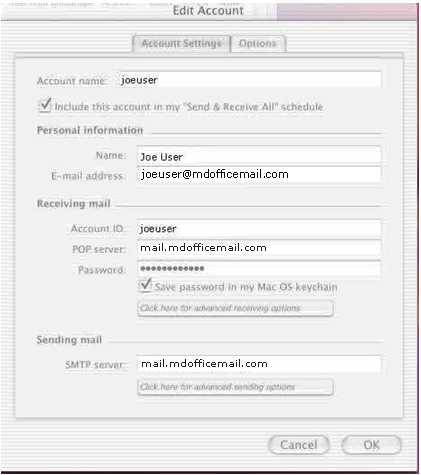
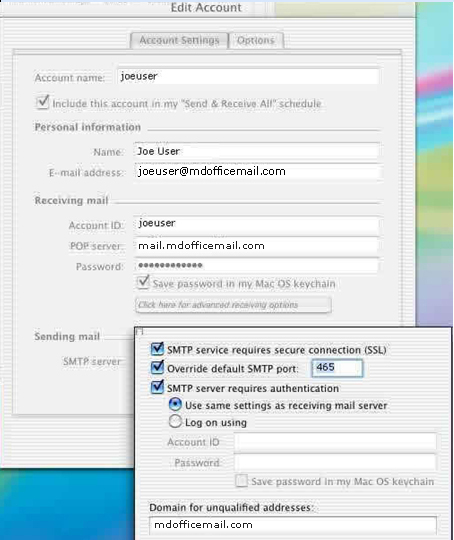
Step 3: Account Settings Configuration
- Enter in the following information:
-
Account Name: This is what you will refer to your account
as (ie: Work mail)
- Name: The name that you want to have displayed when sending Email
- Email Address: Your Email address
- Account ID: Your user name (ie: joeuser)
- POP server: Type mail.mdofficemail.com
- Password: Your Email password
- Save password in my Mac OS Keychain: If you wish to have Mac OS save your password, make sure this is checked.
- SMTP server: Type mail.mdofficemail.com.
Step 4: Advanced POP Options
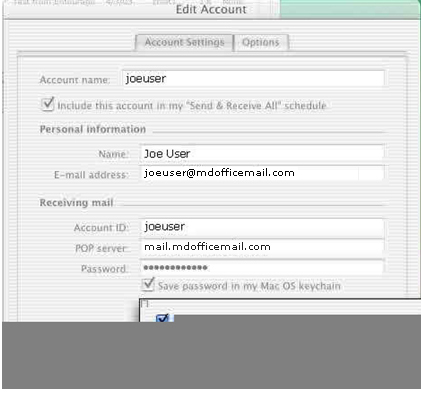
- In the "Receiving Mail" section, choose "Click here for advanced receiving options"
- Click the box for "This POP service requires a secure connection (SSL)" and "Override default POP port"
- Enter 995 in the text field.
- Close the advanced receiving options popup window.
Step 5: Advanced SMTP Options
- In the "Sending Mail" section, choose "Click here for advanced
sending options"
- Make sure there is a checkmark in the "SMTP service requires a secure connection (SSL)" and "Override default SMTP port" checkboxes
- Enter 465 in the text field.
- Make sure there is a checkmark in for "SMTP server requires authentication" checkbox
- Choose "Use same settings as receiving mail server"
- Close the advanced sending options popup window.
- Click "OK" to close the "Edit Account" window.
- You should now be able to send and receive Email.
Manufacturer Technical Support
For technical support from Microsoft, please visit http://support.microsoft.com/default.aspx?scid=sz;[ln];top (select "Office v.X for Mac").